
The Longer LK5 Pro is currently the Shenzhen-based manufacturer's flagship FDM 3D printer, and it's one of the fairly affordable devices that promises to offer a similar experience to pricier 3D printers. And, to my surprise, the combination of simple design and thoughtful functionality works really well for Longer. In fact, after some basic adjustments, I got some very good benchmark print results that compete with pricier printers.
You need to keep in mind, though, that while it's not very difficult to assemble, you'll need over an hour to put everything together, and it will require some fine-tuning that I'm not entirely sure will make the complete assembly be complete. Beginners are happy.
This is true for the entire 3D printing industry as it hasn't figured out a way to make things easier for new users - I know most people just want to take their printer out of the box and start printing without any adjustments.
I also know that people interested in 3D printing won't be turned off by a little tweaking, and the Longer LK5 Pro does offer the user a color touchscreen LCD that works well, along with a heated bed and a bonus feature. The glass bed, and the manufacturer also added some stabilizer bars to help reduce vibration. Furthermore, the device comes with an open-source motherboard, so it's easy to upgrade the LK5 Pro to your liking. That being said, let's examine the Longer LK5 Pro a little deeper and see if it can be considered the best 3D printer in its price range.
Design and Build Quality
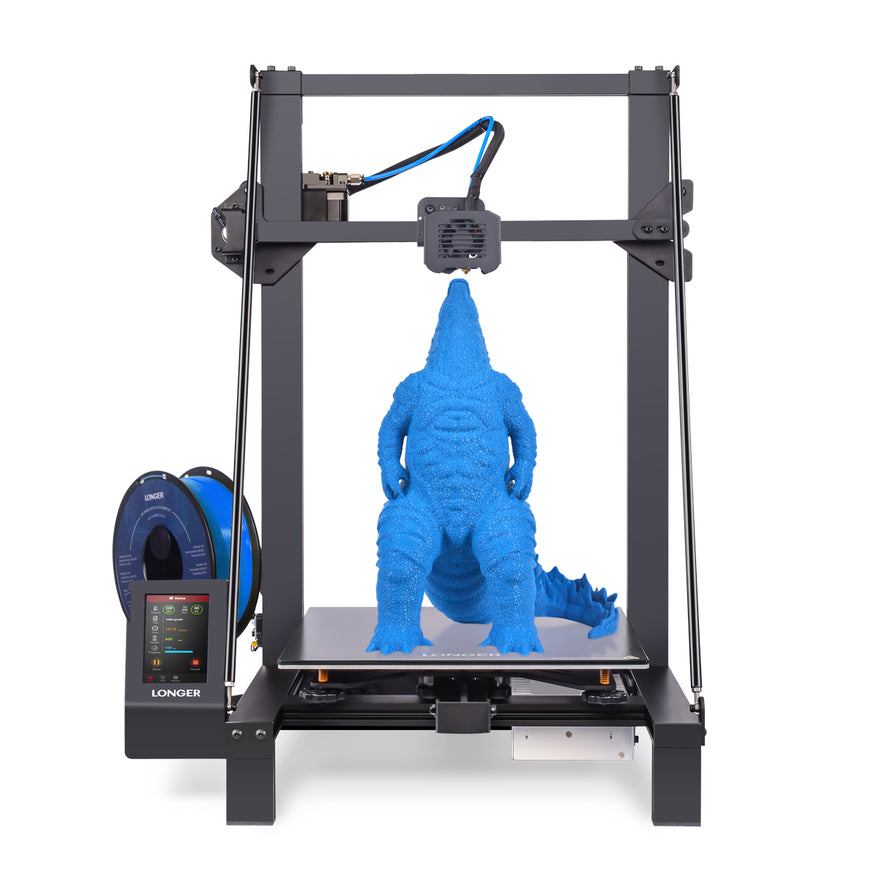
The extended LK5 Pro isn't a successor to the regular LK5, as the manufacturer prefers to use the word Pro to mean using the same color LCD and larger bezel as the LK4 Pro. Obviously there's some marketing crap going on here too. Anyway, the 3D printer is larger than both the LK4 and LK4 Pro when fully built, measuring 22.8 x 21.2 x 26.1 inches (58.0 x 54.0 x 66.3 cm) and weighing 29.8 lbs (13.5 kg), so yes, you do need to Plan where it will be placed as it does take a lot of space. The good news is that the print measures 11.8 x 11.8 x 9.8 inches (30.0 x 30.0 x 40.0 cm), so you can create very large models.
The 3D printer comes partially pre-assembled, since the PSU+ mount connects to the X-axis arm and extruder, so you have to assemble everything else. Inside the package you will find a tall gantry, screw rods and support beams. Due to the taller profile of the Longer LK5 Pro, these beams were necessary to limit vibrations. They do work as expected, but there are a few factors that can cause vibrations, as you'll see in the sections below.
The manufacturer also installed a screw bearing bracket to help hold the screw in place, an upgrade over the exposed Lk4, along with a Z-axis motor, a limit switch, a filament holder, and a touchscreen display.
Additionally, Longer has added a plastic strain relief bracket that you can mount underneath the heatbed and help support the PSU cable. Almost everything is made of metal, with the exception of a few elements, such as the filament holder, which has proven strong enough to hold a heavy coil of filament. The hotbed is made of metal and can reach a temperature of up to 100 degrees Celsius (212 degrees Fahrenheit), however, since it is not insulated, it will take longer to heat up. I also need to mention the extra glass bed you can put on top of the hotbed, which is a great addition, as it's much easier to disassemble the models this way (no forceful removal, they just pop off). The surface is also much more uniform when working with glass, as evidenced by calibration (manually, with a piece of paper). I know some of you might like to see a print room, but that's still out of the question at this price point.
You do get the triangular design, and I do like that the teflon tubing from the extruder to the hot end can handle temperatures up to 280 degrees Celsius (536 F), but note that only supports temperatures up to 250 degrees Celsius (482 building). Another cool element is the filament end sensor, which automatically pauses printing if it detects that the filament is out, then resumes printing after you add the filament back in. The same is true when power is lost, so you don't have to worry about restarting printing, as the Longer LK5 Pro will pick up where it left off when power is restored. I wasn't too sure about the hot end fan duct at first, as it's pretty much the same as the one on the LK4 Pro, but it seems to perform well. You always have the option to print an upgraded version of it, so you can improve it if you get stuck.
The first thing out of the box is the gantry, along with the screw and two support rods. Then there's the spatula, card reader, and microSD card - when you remove this part, be aware that the glass bed is not attached to the assembly, so it could fall and shatter (we don't want that). The rest of the 3D printer is almost pre-assembled, but there are some important parts that need to be added. Before installing anything, I flipped the pre-assembled part of the printer over, and as you can see, the longer plastic feet can (and should) be replaced with silicone feet. The plastic feet are useless for jerks or shocks, while the rubber feet do a good job of absorbing some vibrations.
Then there's Cheng Liang's P360W24V power supply, which is a fairly generic power supply, but should work just fine. Fans have always been a weak point of Longer 3D printers as they can be very loud, the LK5 Pro does have three fans (in addition to the PSU fan) - one on the base of the frame and two on the end of the X-axis beam (for the hot end).
Interestingly, the fans aren't as loud as on the LK4 (the LK4 pushes the 12V fans to 24V), by far, but they're still the easiest part to hear as the Longer makes pretty much everything else quiet - except Exception for extruders. To see why, I decided to open up the main section and had to remove quite a few screws using one of the provided Allen keys. With that, I can see that the LGT_KIT_V1.0 board has three detachable silent steppers (TWC2208) with a small heatsink on top, and the processor is an 8-bit Arduino ATMEGA2560. The extruder does have a different stepper driver (as I expected), and it's not the silent type (couldn't recognize it), but the good news is that you can replace it if it bothers you.
If you look around the PSU you'll find a sticker with instructions to switch between 230V and 115V depending on your country - since I'm in Europe at the time of writing I set the switch to 230V , which is the default, but I know that in the US, you need to change it to 115V.
Once finished, you can start the assembly, according to the instructions on the box, we need to pass the X-axis beam through the gantry rod, and then turn the assembly screw into the X-axis beam dedicated brass nut. Next, I took the X-axis motor and two M4*16 screws, and screwed the motor to the gantry. I then inserted the lead screw into the top of the motor and after unscrewing the coupling's screw the lead screw slid in. Now you can adjust the height of the X-axis beam. The next step requires four M5x20 screws that you will need to secure the gantry to the base. Accessing it from the bottom is very difficult, so it's best to set the whole assembly aside so that the screws can be easily inserted into place. Now it's time to add the support rods, for this you need to use four M4*8 bolts and make sure there is a 90 degree angle between the gantry and the base. I needed to adjust the support rods a bit as the angles were really off, which is absolutely necessary if you are using four bolts to connect two tall columns.
After finishing, use two M4*16 and two M5*20 bolts to connect the limit switch and the filament holder. The limit switch is on top to hold the screw in place and the filament holder is on top of the printer beam. I was a bit surprised by the filament holder on the Selpic Star A Mini 3D printer, but here it seems to be a bit more solid, despite also being made of plastic. After that we need to install the display, the area where the display needs to be added is very obvious as it is the only part where the aluminum is exposed. So take two M5*6 bolts to attach the display and attach the Z-axis limit switch near the X-axis motor. Next we need to connect all the wires so connect the Z cable to the Z axis limit switch, another Z cable with more pins to the motors and the LCD cable to the back of the display. A thick PSU cable connects to the back of the metal bed, then an E-cable with more pins is added to the extruder block, and another E-cable goes to the filament detector. The other two X cables go to the motor.
We're not done yet, as you'll need to use the wrench provided to stabilize the bed. There are three screws underneath that need to be tightened (or loosened) so that the bed loses the rocking effect - use the moving plastic wheel to get a feel for the screws. Now it's time to adjust the heat bed - to do this, turn on the printer (turn it on) and tap the "Leveling" tab on the display. You will now see five points and you will need to click on each one at a time and adjust the wheels from under the bed until all five parts allow you to move a piece of paper with just a little resistance.
It's important to know that you have to go to 4 and back to 1 several times until the seedbed is properly leveled, and yes, this can take quite a while (I played about 20 minutes). I've noticed that the spring quality is good, but the knob could be bigger as it's not easy to move and adjust - you can print new knobs now. Before you start printing anything, it's also a good idea to check that the X-axis motor is moving smoothly, if not, take a wrench and adjust the screw from under the motor.
The Longer LK5 Pro does have the same color display as the LK4 Pro, and it's still pretty good. It's a touchscreen, so no buttons, and generally very responsive, except in areas where some tabs are too narrow - so I had to try two or three times to get the right area. Other than that, the LCD screen is fast and responsive. Immediately after powering on the 3D printer, the display will show six tabs, the first tab is called "Move", which essentially allows you to manually move the hot end (you can also return it to the main position), and the second The second tab is "File". Here you can see all printable 3D models. This only happens if you have inserted a microSD card or connected an external drive or computer to a USB port.
The third tab allows you to adjust the LK5 Pro (bed and nozzle temperature, fan speed, flow, and nozzle flow), while the fourth tab allows you to add or remove filament, as well as select the type (it works with ABS and PLA use). The last two tabs can be used to level the hotbed and check some info about the Longer LK5 Pro.
The cool thing is that you can adjust your print from the LCD display without having to re-slice the model again like you do with other cheap 3D printers.
